Outlook 2013 mail client setup
This guide shows how you can set up your mail for your Outlook 2013 client.
Step 1: Creating profile
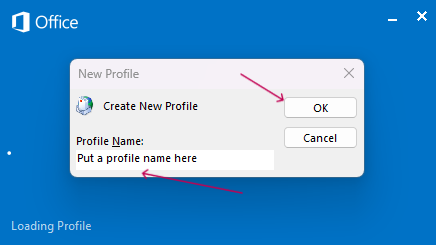
The first step is to open Outlook 2013 and create a profile if it asks for it.
Step 2: Manual setup
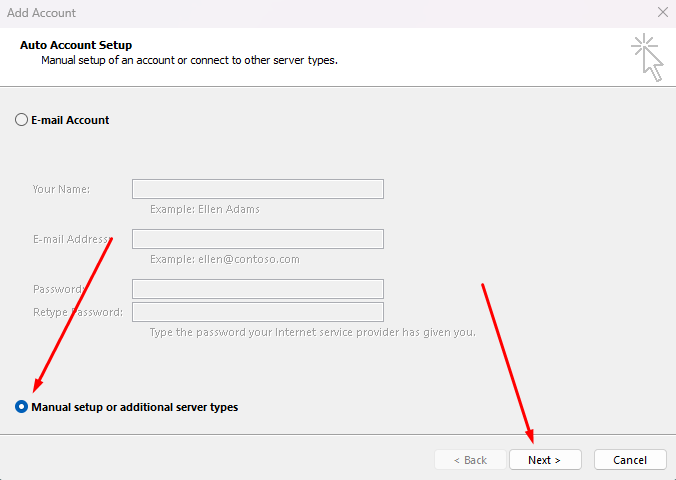
Click Manual Setup and hit Next.
Step 3: IMAP/POP
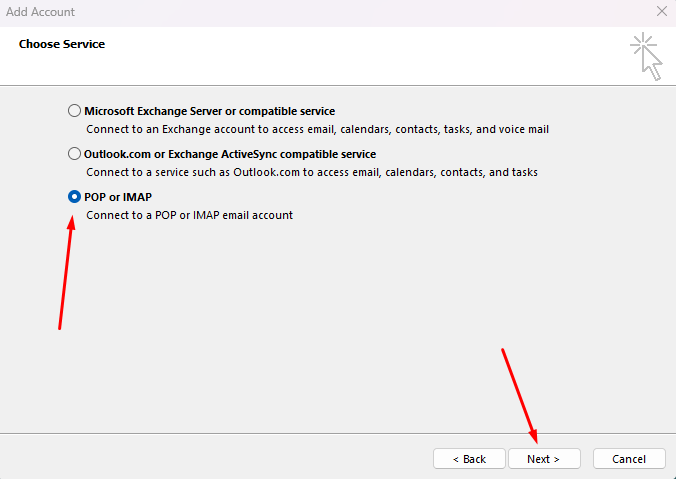
Select POP or IMAP and press Next.
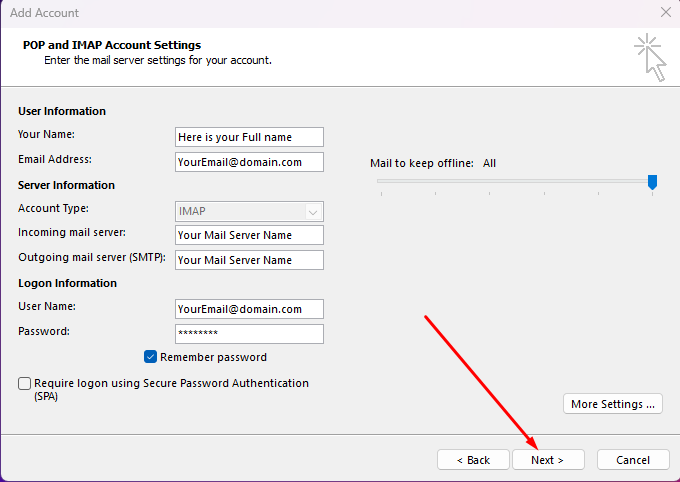
Step 4: Put your details
- Enter your full name
- Your mailbox address
- Select IMAP or POP depending on your needs
- Put incoming and outgoing mail server names.
- Click More Settings.
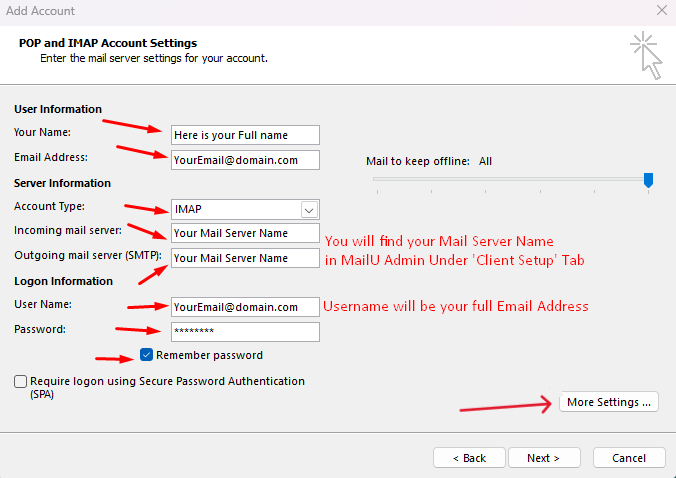
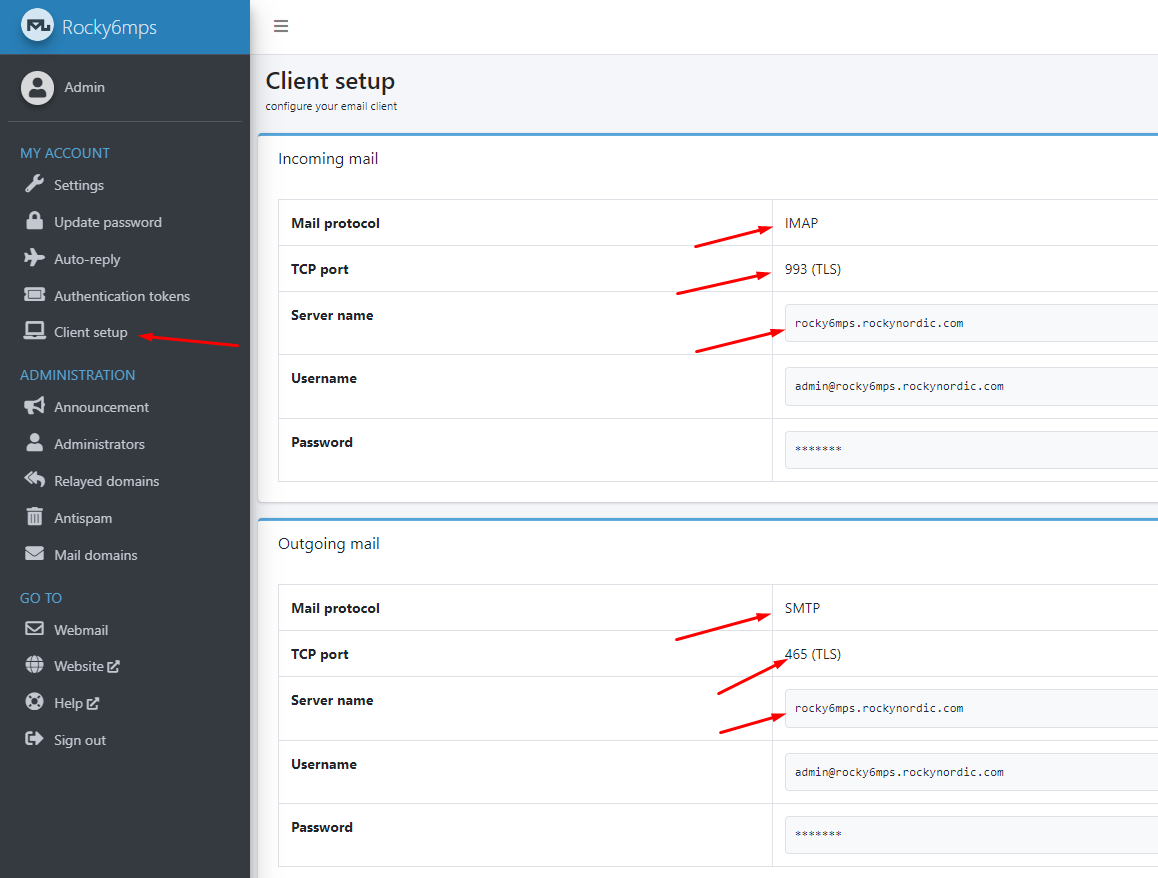
For incoming and outgoing mail server name, the information is available under your Client Setup tab on the MailU Admin dashboard login page. The mail server name will differ from user to user. So it is important to know the correct mail server name for your mail domain.
For Example: rocky6mps.rockynordic.com , azero4mps.azero.cloud.
MailU Admin Login -> Rocky6mps | Azero4mps
Here’s an image how the MailU Admin dashboard looks under client setup. This is for rocky6mps.rockynordic.com mail server. You will see a similar dashboard page when you login to the MailU Admin page.
Step 5: General
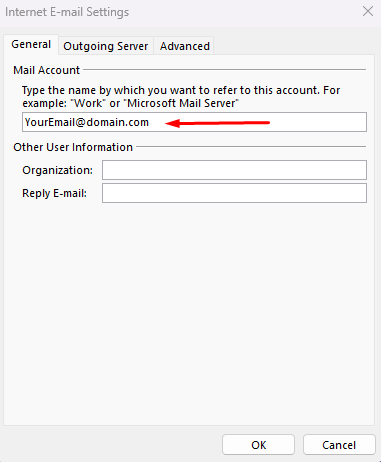
In the More Settings option, under the General tab, put your full email address under your Mail account.
Step 6: Outgoing server
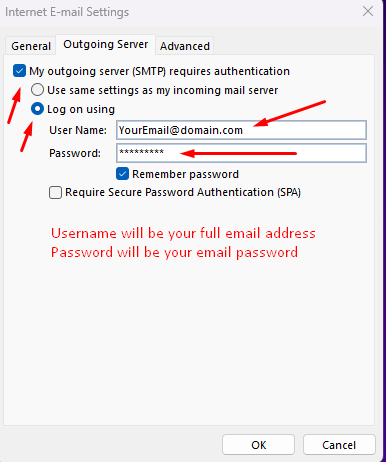
Under the Outgoing tab, check the boxes according to the screenshot and enter your full email address in the username field and your email password in the password field.
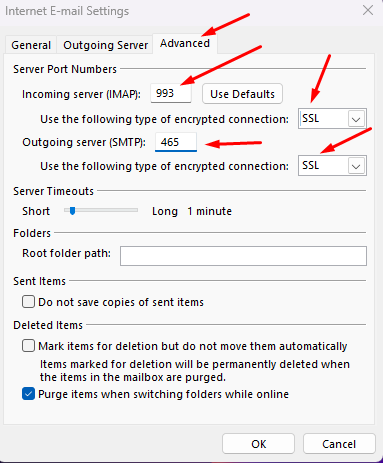
Step 7-IMAP: Advanced
Under the Advanced tab, for IMAP solution, put 993 for the incoming server port and put 465 for the outgoing server port. Choose SSL for the encryption method.
Step 7-POP3: Advanced
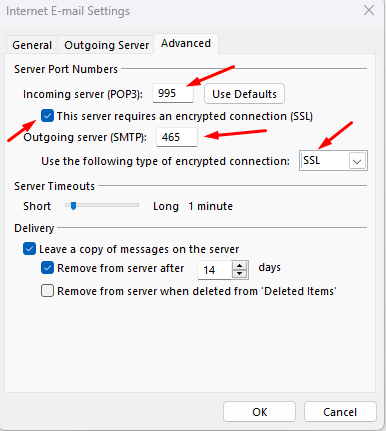
Under the Advanced tab, for the POP3 solution, put 995 for the incoming server port and put 465 for the outgoing server port. Choose SSL for the encryption method.
Step 8: Done
Click Next
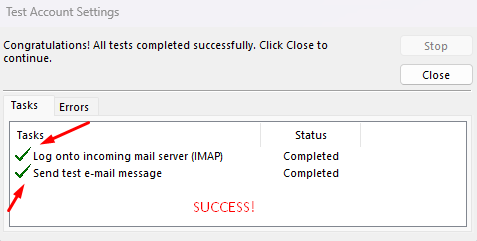
For IMAP – You will see a success message like this below
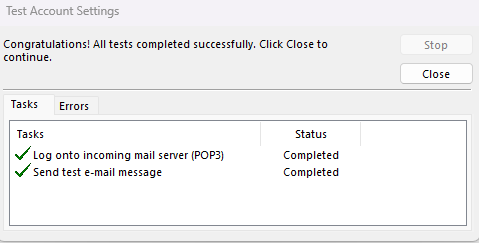
For POP3 – You will see a success message like this below
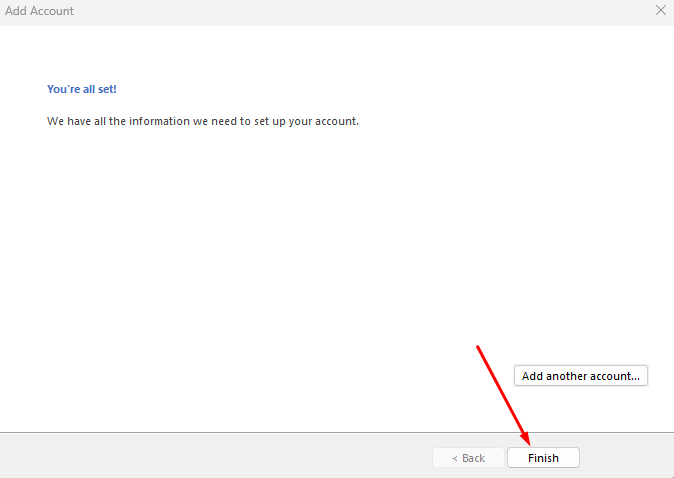
Press Finish
